A practical guide to IoT with Zigbee2Mqtt RaspberryPi & Home Assistant
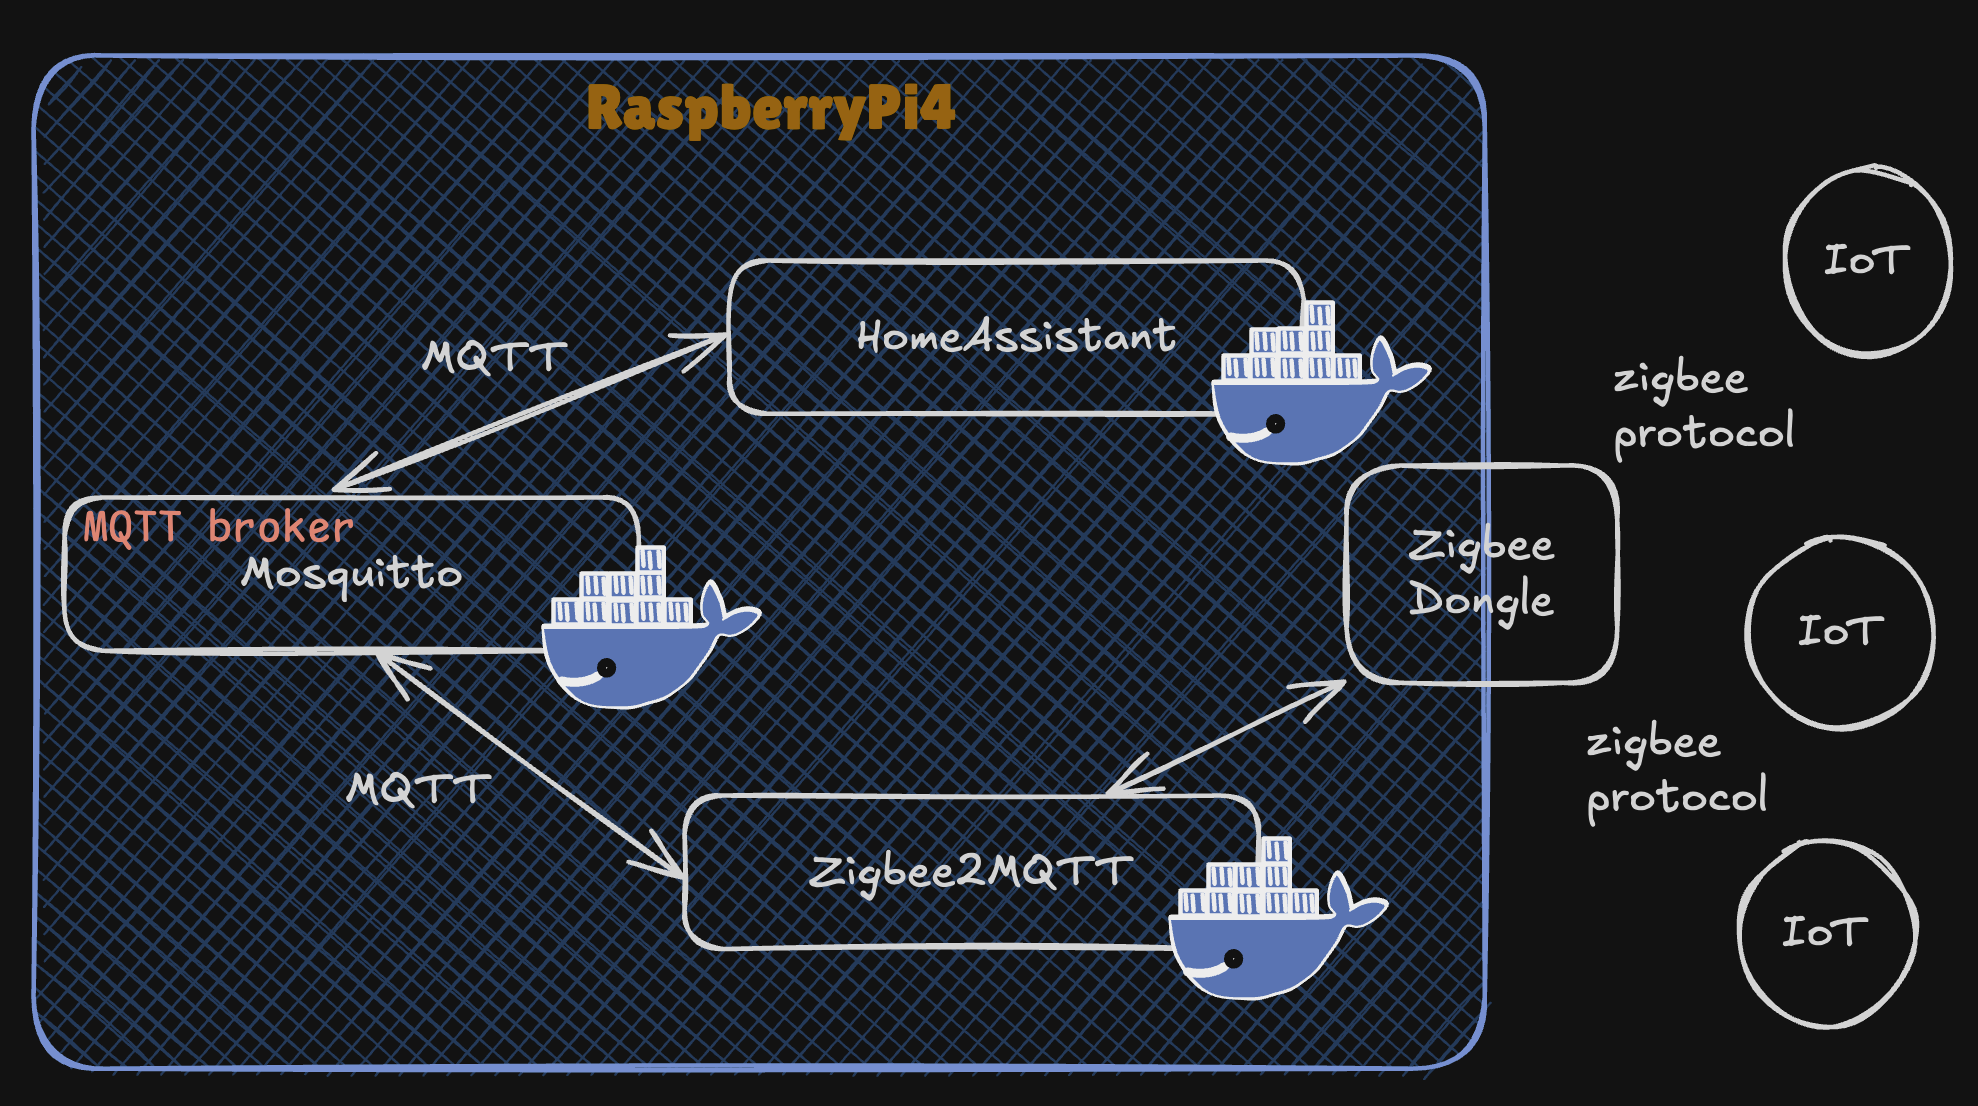
In this hands-on walkthrough, I install Home Assistant on a Raspberrypi using Docker and setup Zigbee2MQTT to communicate with Zigbee enabled IoT devices over the MQTT protocol.
The diagram of this setup is shown in the figure above.
But first, let’s talk about the why before jumping to the how.
1. Why this setup
Setting up Home Assistant with Zigbee2MQTT, Mosquitto, and Docker on a RPi4 is an excellent choice for a smart home environment.
Here are the key benefits of this setup:
1. Centralized Smart Home Management
Home Assistant serves as the central hub for managing and automating all your smart home devices, providing a single interface for controlling Zigbee devices, lights, sensors, and more.
MQTT (Message Queuing Telemetry Transport) is a lightweight, publish-subscribe-based messaging protocol that allows devices and systems to exchange data with each other in a scalable and efficient manner.
It’s often used for IoT applications where devices need to send or receive messages at irregular intervals, making it suitable for use cases such as smart home automation.
By integrating Zigbee2MQTT and Mosquitto, it becomes possible to control Zigbee devices alongside devices using other protocols (e.g., Wi-Fi, Z-Wave, Bluetooth).
2. Cost-Effective and Flexible Solution
Using a Raspberry Pi 4 keeps costs low while offering sufficient processing power to handle a smart home ecosystem.
There’s no need to invest in expensive proprietary hubs for Zigbee devices since Zigbee2MQTT bridges Zigbee to MQTT.
Zigbee2MQTT allows you to connect and manage devices from different manufacturers, bypassing proprietary ecosystems (e.g., Philips Hue, Aqara, or IKEA Tradfri).
You’re not locked into a single-brand hub, enabling you to mix and match devices based on functionality and price.
3. Platform Independence with MQTT
Mosquitto MQTT serves as the message broker, enabling lightweight and fast communication between devices and Home Assistant.
MQTT is an open standard, ensuring compatibility with a wide range of devices and services.
| A side note here, most smart cars today communicate with their Cloud using MQTT. This is to illustrate how mature and stable the protocol is.
4. Docker for Modularity and Easy Management
Docker simplifies the installation, updating, and maintenance of services like Home Assistant, Mosquitto, and Zigbee2MQTT.
- No dependency conflicts between services.
- Easy to back up, restore, or migrate the setup to another system.
- Isolation ensures one service does not interfere with another.
5. Scalability
This setup can be easily scaled up to:
- Add more Zigbee devices without additional hubs.
- Integrate with more protocols like Z-Wave, Thread, or Matter in the future.
- Incorporate additional smart home services and automations within Home Assistant.
6. Local Control, Privacy and Power Economy
Everything runs locally on the Raspberry Pi, ensuring:
- No reliance on cloud services for device operation.
- Increased privacy and security as data stays within your home network.
- Faster response times since there’s no latency from cloud servers.
Also, the Raspberry Pi 4 consumes very little energy compared to traditional servers, making it an eco-friendly solution for a 24/7 smart home controller.
7. Open Source and Community Support
The setup is powered by open-source software (Home Assistant, Zigbee2MQTT, Mosquitto), backed by strong community support.
Frequent updates and a large pool of user-generated integrations ensure your setup can adapt to new devices and technologies.
Home Assistant’s powerful automation engine allows for highly customizable rules and workflows, such as:
- Automatically turning off lights when no motion is detected.
- Sending notifications based on sensor data (e.g., high humidity, water leaks).
- Controlling devices based on time, weather, or other triggers.
Use Case Example
Imagine automating your entire home’s lights, sensors, and appliances:
- A motion sensor detects you entering the room.
- Zigbee2MQTT relays the event to Home Assistant through Mosquitto.
- Home Assistant turns on the lights and adjusts their brightness based on the time of day.
This setup seamlessly integrates diverse devices and creates powerful, energy-saving automations.
2. The Walkthrough
0. Prerequisite
There are some prerequisits that I won’t present in this walkthrough.
You need three things:
- Have your RaspberryPi OS installed and connected to the network
- Have a Zigbee dongle attached to it
- Be able to ssh into your RaspberryPi
1. Install Docker on Raspberry Pi OS
Docker can be installed on Raspberry Pi with only two commands:
1
2
curl -sSL https://get.docker.com | sh
sudo usermod -aG docker $USER
This will download and run the installation script on your device, and allow your current user to use Docker.
Once Docker is installed, we can directly start using it. There is a tiny container you can try to download and run to make sure everything is working properly.
1
docker run hello-world
2. Start Home Assistant
To install Home Assistant using docker, follow the provided documentation.
Here are the important parts:
Installation with Docker is straightforward. Adjust the following command so that:
/PATH_TO_YOUR_CONFIG points at the folder where you want to store your configuration and run it. Make sure that you keep the :/config part.
MY_TIME_ZONE is a tz database name, like TZ=Europe/Stockholm.
1
2
3
4
5
6
7
8
docker run -d \
  --name homeassistant \
  --privileged \
  --restart=unless-stopped \
  -e TZ=MY_TIME_ZONE \
  -v /PATH_TO_YOUR_CONFIG:/config \
  --network=host \
  ghcr.io/home-assistant/home-assistant:stable
Once the Home Assistant Container is running Home Assistant should be accessible
using http://<host>:8123 (replace with the hostname or IP of the system).
3. Setup Zigbee2MQTT
We will run Zigbee2MQTT using Docker too using the follwing command:
1
2
3
4
5
6
7
docker run -d \
--name zigbee2mqtt \
--device=/dev/ttyUSB0:/dev/ttyUSB0 \
-v $(pwd)/data:/app/data \
-v /run/udev:/run/udev:ro \
-e TZ=Europe/Stockholm \
koenkk/zigbee2mqtt
Make sure to update the configuration.yaml located in the data folder that the previous command creates in the current folder.
We need to tell the container where is our Zigbee dongle in the host OS (RaspberryPi OS) and pass it to it.
1
2
serial:
  port: /dev/ttyUSB0
To the right value, run this command from your Raspberry Pi terminal:
1
ls /dev/ttyUSB*
Now, we need to check that the container is running fine and there are no errors:
1
2
3
4
5
6
7
8
9
10
11
12
$ docker logs zigbee2mqtt -f
Using '/app/data' as data directory
Starting Zigbee2MQTT without watchdog.
[2024-11-28 20:55:23] info:     z2m: Logging to console, file (filename: log.log)
[2024-11-28 20:55:23] info:     z2m: Starting Zigbee2MQTT version 1.41.0 (commit #cc31cea)
[2024-11-28 20:55:23] info:     z2m: Starting zigbee-herdsman (2.1.7)
[2024-11-28 20:55:24] info:     zh:zstack:znp: Opening SerialPort with {"path":"/dev/ttyUSB0","baudRate":115200,"rtscts":false,"autoOpen":false}
[2024-11-28 20:55:24] info:     zh:zstack:znp: Serialport opened
[2024-11-28 20:55:24] info:     z2m: zigbee-herdsman started (resumed)
[2024-11-28 20:55:24] info:     z2m: Coordinator firmware version: '{"meta":{"maintrel":1,"majorrel":2,"minorrel":7,"product":1,"revision":20210708,"transportrev":2},"type":"zStack3x0"}'
[2024-11-28 20:55:24] info:     z2m: Currently 0 devices are joined.
[2024-11-28 20:55:24] info:     z2m: Zigbee: disabling joining new devices.
4. We need a MQTT brocker (Mosquitto)
We can use MQTT without a broker, but it would be much convinient to have one down the road. So, let’s get this done now.
Similarly, our MQTT broker, Mosquitto in this case, will be run inside a Docker container.
Here is the command.
Few things need to set here:
- a Docker network: to make sure that the container can communicate with each other.
- some configuration files for Mosquitto broker
1
2
3
4
5
6
7
8
9
10
11
docker run -d \
  --name mosquitto \
  --restart=unless-stopped \
  --network homeassistant \
  -p 1883:1883 \
  -p 9001:9001 \
  -v $(pwd)/mosquitto/config:/mosquitto/config \
  -v $(pwd)/mosquitto/data:/mosquitto/data \
  -v $(pwd)/mosquitto/log:/mosquitto/log \
  -v $(pwd)/mosquitto/run:/mosquitto/run \
  eclipse-mosquitto
Now, we need to update the configuration of our Zigbee2MQTT to use the Broker:
1
2
3
4
5
6
7
8
9
10
11
docker stop zigbee2mqtt
docker rm zigbee2mqtt
docker run -d \
  --name zigbee2mqtt \
  --device=/dev/ttyUSB0 \
  --network homeassistant \
 -e TZ=Europe/Stockholm \
  -e MQTT_SERVER="mqtt://mosquitto:1883" \
  -v $(pwd)/data:/app/data \
  -v /run/udev:/run/udev:ro \
  koenkk/zigbee2mqtt
Make sure that both containers belong to the homeassistant network:
1
2
3
4
5
6
7
8
9
10
11
12
13
14
15
16
17
18
$ docker network inspect homeassistant
...
  "Containers": {
        "2517f04bf088133af3072d24fa160b3fa46e05d595612eefee8728966a549177": {
            "Name": "mosquitto",
            "EndpointID": "ae45d82cd2328c59d66086a925c244e9d7acca261add76460a6e108aa5f1ef12",
            "MacAddress": "02:42:ac:13:00:02",
            "IPv4Address": "172.19.0.2/16",
            "IPv6Address": ""
        },
        "2a76d6b4de646a9739c311884679df769215e9e93a6d8465c5c1cf203adb9534": {
            "Name": "zigbee2mqtt",
            "EndpointID": "b10a08392d2e59a24fad3c83e4527eea9d67bd0080fb9595680f3ca1301ef3be",
            "MacAddress": "02:42:ac:13:00:03",
            "IPv4Address": "172.19.0.3/16",
            "IPv6Address": ""
        }
        ...
5. Configure Home Assistant
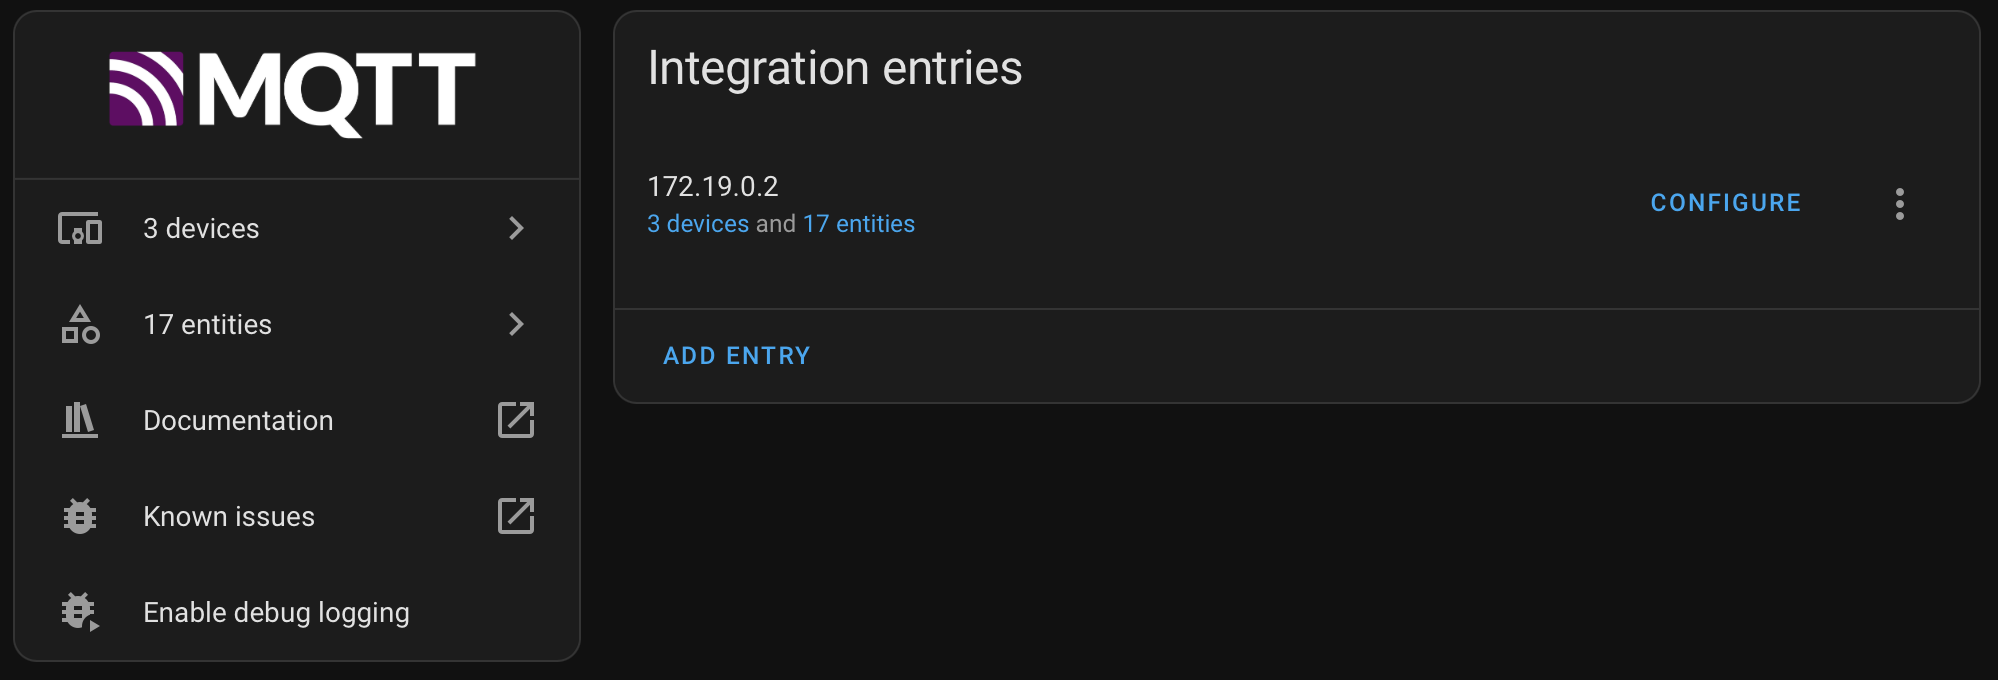
Go to Home Assistant’s Settings > Devices & Services. Look for the MQTT Integration.
Devices connected via Zigbee2MQTT should appear automatically under the MQTT integration. If not: Ensure MQTT is properly configured in Home Assistant’s configuration.yaml.
🎉🎉🎉 We got our IoT devices speak MQTT with our Home Assistant over Zigbee.
6. Troubleshooting
6.1. z2m: MQTT failed to connect, exiting
If you get trouble getting zigbee2mqtt to connect to the MQTT broker, you can use a MQTT client to test the connection.
Subscribe to a Topic: Replace
1
2
mosquitto_sub -h <broker-ip> -p 1883 -t '#' -u '<username>' -P '<password>'
This subscribes to all topics (#) on the broker.
Publish a Message: To publish a test message, run:
1
mosquitto_pub -h <broker-ip> -p 1883 -t 'test/topic' -m 'Hello, MQTT!' -u '<username>' -P '<password>'
Replace test/topic with the topic name and Hello, MQTT! with your desired message.
6.2 Install mosquitto_pub / mosquitto_sub
1
2
3
4
5
6
7
8
sudo apt update
sudo apt install -y mosquitto-clients

# This subscribes to all topics (#) on the broker.
mosquitto_sub -h <broker-ip> -p 1883 -t '#' -u '<username>' -P '<password>'
# Replace test/topic with the topic name and Hello, MQTT! with your desired message.
mosquitto_pub -h <broker-ip> -p 1883 -t 'test/topic' -m 'Hello, MQTT!' -u '<username>' -P '<password>'
6.3. Getting the Broker IP address
How to get the ip for the docker container running mosquitto.
Run the following command to inspect the container and find its IP address:
1
docker inspect -f '\{\{range .NetworkSettings.Networks\}\}\{\{.IPAddress\}\}\{\{end\}\}' mosquitto
This command retrieves the IP address of the mosquitto container.


